User Guide
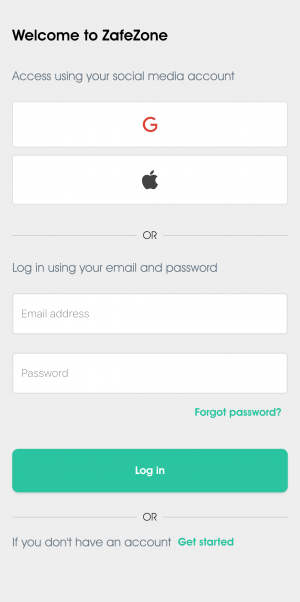
Login Screen
To enter to ZafeZone you need to use this link https://zafezone.app
There are two ways to enter:
(RECOMMENDED)
a) Login with a Google Account
If you already have a Google identity via Gmail (@gmail.com) we recommend you use this option so that you don’t have to remember another password.
b) Login with a Local Account
- If you don’t have a ZafeZone account you can click “Get Started” to start creating an account.
- If you want to create an account with Google, you need to click on the Google icon. The app automatically sends you to the registration page.
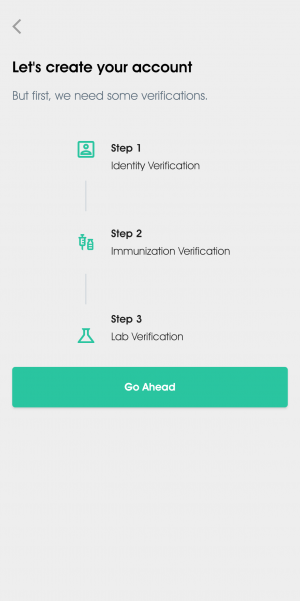
Let’s Create Your Account
- After selecting the option to create an account, you will see the steps to create an account.
- Select Continue to proceed to the next step.
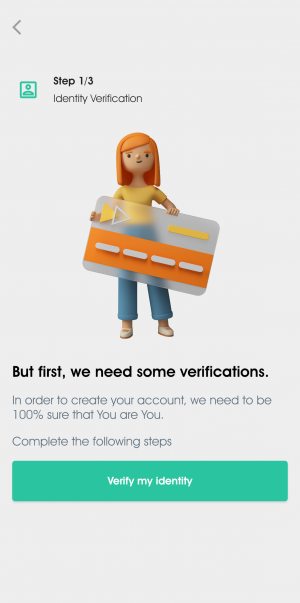
Account Creation - Identity Verification
- Let’s start with identity verification.
- Select verify my identity to proceed to the next step.
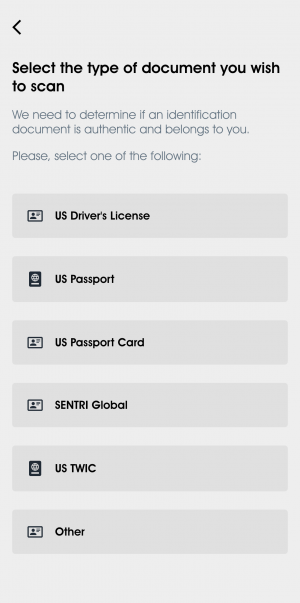
Account Creation - Identity Verification part 1
In this part, we will select the type of document that we want to use to register in ZafeZone.
We have so many different types of documents:
- US Driver’s License
- US Passport
- US Passport card
- SENTRI Global
- US TWIC
If you don’t have any of these types of documents you can use the Other type option.
Account Creation - Identity Verification part 2
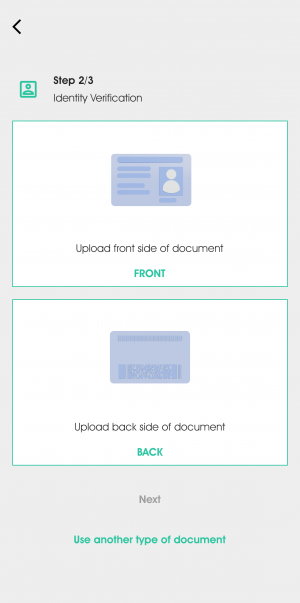
According to the type of document selected, the application will ask for the front part only or both parts.
- To Upload a picture you need to select the front part, in the device, you will see two options:
- Use the camera
- Select a document from My Documents
- If it is the case that the back part is also required, then it would be the same process, only this time selecting the back part.
- If you wish to select another type of document you can select the option “Use another type of document”.
Account Creation - Identity Verification part 2 cont.
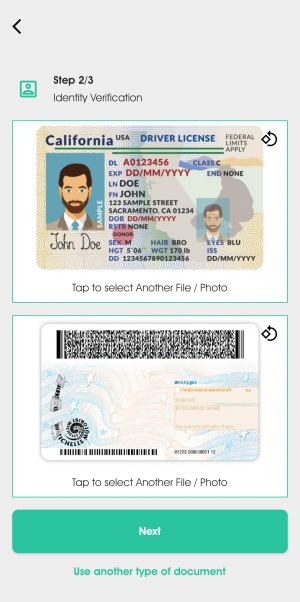
After uploading and validating that the photos uploaded correctly, we select Next.
If you need to retake the photo, you can click again in the front/back box to upload the photo again.
Account Creation - Identity Verification part 3
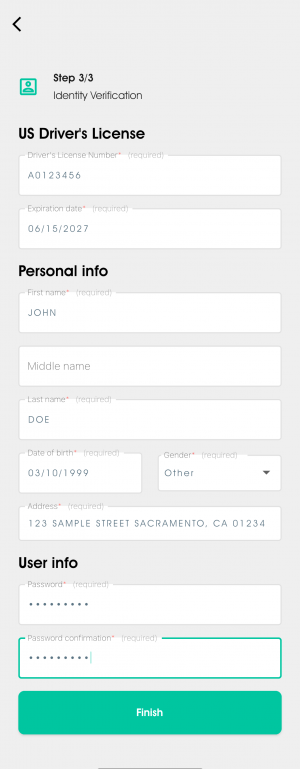
- Now it will ask you for the document’s information and your personal information
- You must fill in each of the required fields to continue.
- If you use a Driver’s license, Passport, or Passport card, some fields may be filled in automatically. If you select one of these documents, you must verify that the information is correct.
- After completing all the fields, we select Finish.
- If you signed up with Google it will automatically go to the next step.
- If you signed up with a local account, you’ll need to verify your email. After you verify it, you can access it with the email and password that you put in your information. PS: If you can’t find the email, you should check your Spam/Junk mail.
Account Creation - Immunization Verification Part 1
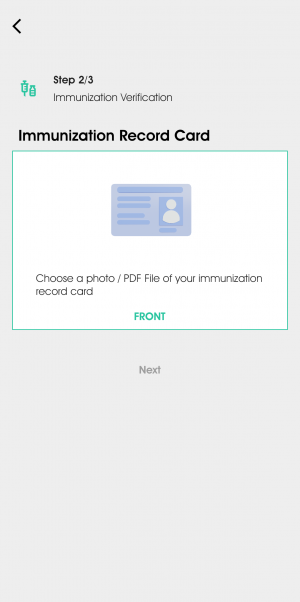
- If you signed up with Google, you’ll automatically be taken to the Immunization Verification step.
- In this part, you can upload the Immunization Record card to have that information.
- To Upload a picture you need to select the front part, in the device, you will see two options:
- Use the camera
- Select a document from My Documents
- After you add the photo, you can click continue to proceed to the next step.
- If you want to skip this step, select Skip for now. Later you will be able to upload the immunization record card again.
- If you registered locally, you must log in with your account, and once inside, slide to the Immunizations screen.
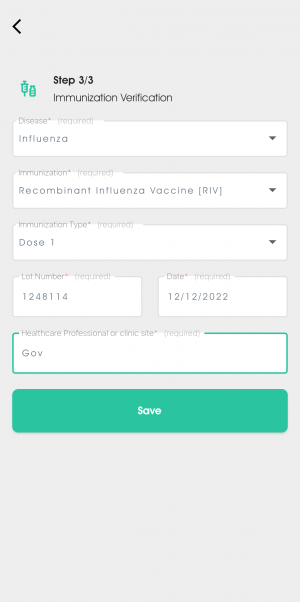
Account Creation - Immunization Verification Part 2
- After uploading the photo of the immunization record card, you will need to fill in the card information.
- You must fill in each of the required fields to continue.
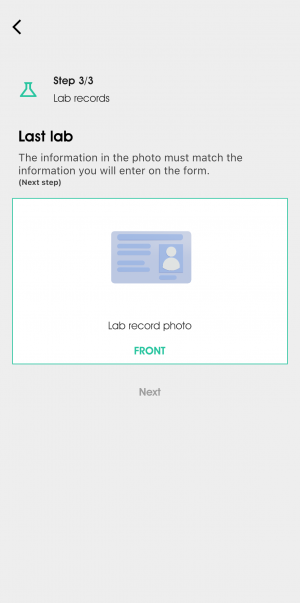
Account Creation - Lab Records Part 1
- If you signed up with Google, after finishing the immunization verification process, you will go to Lab Records.
- In this part, you can upload the last lab results.
- To Upload a picture you need to select the front part, in the device, you will see two options.
- Use the camera
- Select a document from My Documents
- After you add the photo, you can click continue to proceed to the next step.
- If you want to skip this step, select Skip for now. Later you will be able to upload the Lab Records again.
- If you registered locally, you must log in with your account, and once inside, slide to the Lab Records screen.
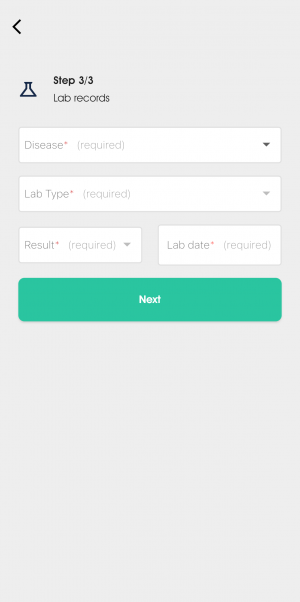
Account Creation - Lab Records Part 1
After uploading the photo of the lab records, you will need to fill in the information.
- You must fill in each of the required fields to continue.
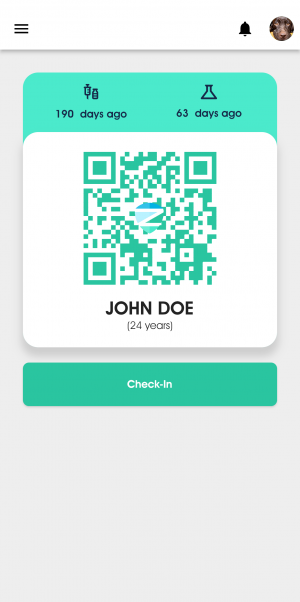
Check-in Screen
On this screen, you will be able to see the following information.
- You will be able to see the latest update on your immunization card and your latest lab.
- See your personal QR code.
- See your name and age.
- Make Check-in and Check-out from a zone.
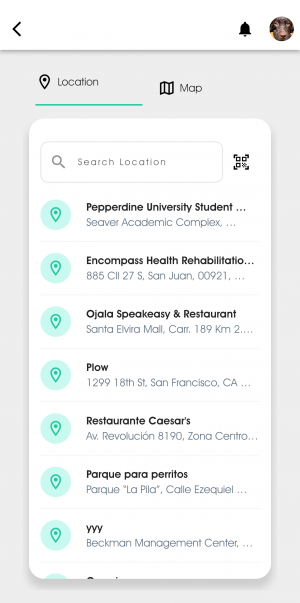
Creating a check-in in a zone
In the check-in, screen click on the check-in button
Once inside, there are several ways to check-in:
- Use the search box to find a specific zone.
- Select the zone from the list.
- Using the QR icon you can check in by scanning the QR code of the zone.
- Using the map to find the zone.

Check-out in a zone
After check-in in a zone, now you can see the Check-out button, the time that you are in the zone, and the click for more details button.
- When you finish in the zone, we press the Check-out button to end the time in the zone.
- After you check out from a zone, you will be able to see that information on the History screen.
- When you are check-in in a zone, you will be able to see the “see more details” button. Which will take you to the current check-in information
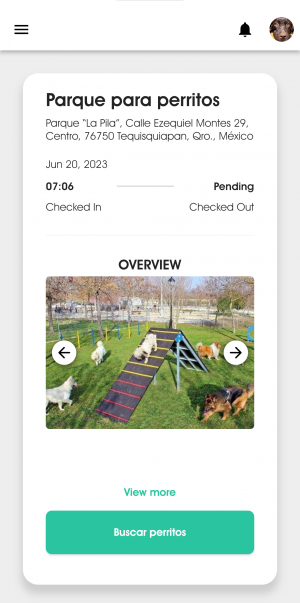
Check-in Details screen
On this screen, you can see all the details of the active check-in.
- See the details of the zones
- See some pictures about the zones.
- Interact with buttons that can show you some informative documents about the zones.
- Also shortcuts to another website related to the zones.- Not all zones have this, each zone will have its way of being customized.
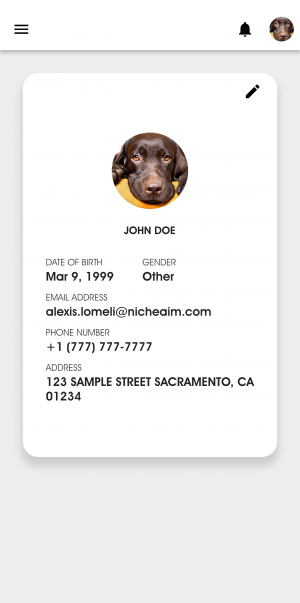
Profile Screen
On this screen you will be able to see all the details of your information:
- See your personal information
- Update your personal information
- Change the profile picture
- Change the password
- Link/unlink social accounts.
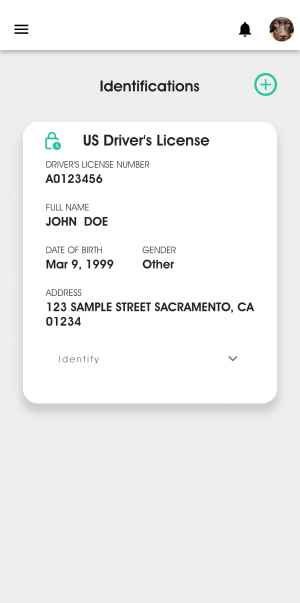
Identify screen
On this screen, you will be able to see all of the identification in your account.
- It will show you all the identification.
- Also you can add more identification by clicking on the plus button.
- Each identification has a expand button to see the picture of that identification.
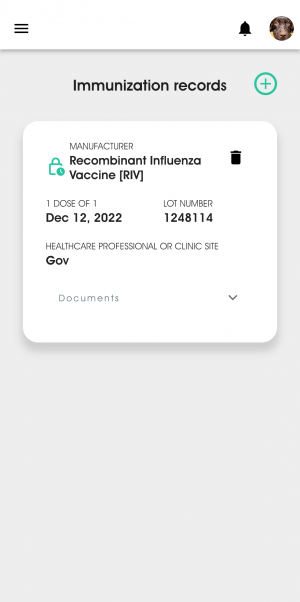
Immunizations Records Screen
On this screen, you will be able to see all of the immunization records that you have in your account.
- See all registered immunization records.
- Also you can add more immunization records by clicking on the plus button.
- Delete an immunization record
- Each immunization record has a expand button to see the picture of that immunization record.
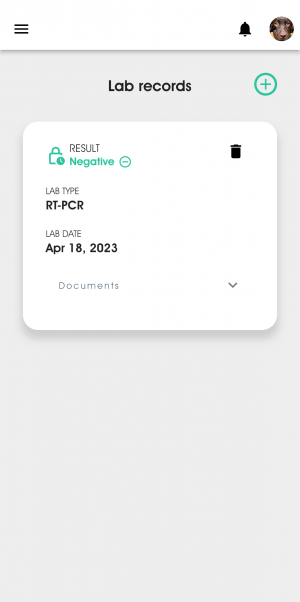
Labs Records Screen
On this screen, you will be able to see all of the Labs Records.
- See all registered lab records
- Also you can add more lab records by clicking on the plus button.
- Delete a Lab Record.
- Each lab record has a expand button to see the picture of that lab record.
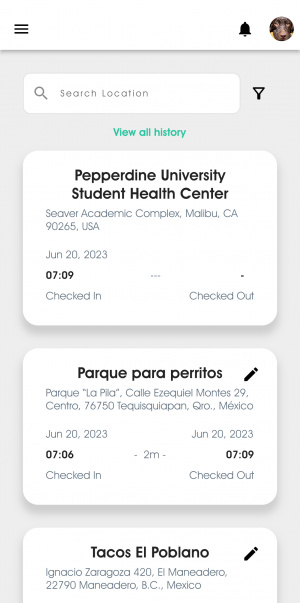
History Screen
On this screen, you can see all the times you enter a zone.
- You will be able to see all the information about the zone you were in and if there was a positive case of Covid in that area.
- You can also edit the time in that zone.
- You can use the search box to find and specific zone.
- Use the filters to simplify that search.
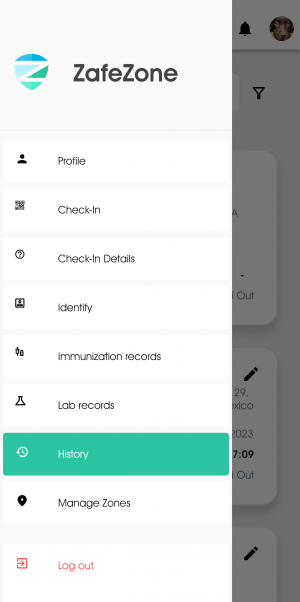
Navigation Menu
With this menu, you can navigate between the different screens quickly.
- You can use this menu to switch from one screen to another.
- Also you will find the log out button.
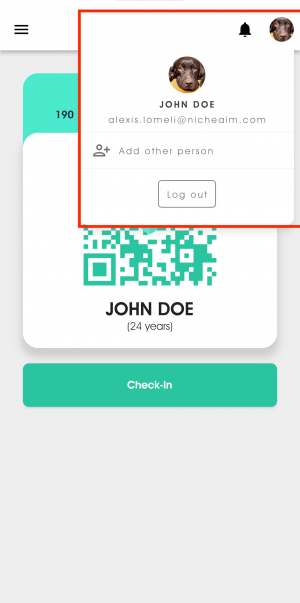
Personal Menu
To access this menu you must touch the profile picture that is located at the top on the right. In this menu you can:
- See your basic information
- Add users as secondary. These users are registered under the main user without the need to create an account.
- Log off of the account.
